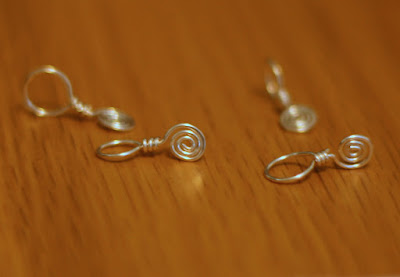
I know you’ve all been anxiously awaiting this, so here is part two of my post on scrabble tile pendants! Once the resin had cured on the scrabble tiles, the next step was to add the bails (or, pendant-hanging thingers, as I would have called them a couple of years ago before I started making jewelry-I’ve learned a lot of new terminology!) There are a lot of pre-made glue-on bails available, mostly by Aanraku. But being me, I wanted to make my own bails from wire. I had some idea as to how it might be done, and I looked around online for examples to see if anyone else was doing something similar. I didn’t find any, and I started wondering if handmade bails would even work! Luckily I asked around to a few of my jewelry-making ‘tweeps’ on Twitter, one of whom has made her own bails in the past and she reassured me so I got started!
I made the bails themselves with 22 gauge half-hard wire. I made a small wire spiral, and made a large wrapped loop on top. (That was especially exciting as I got a chance to use my new wire looping pliers!) I’m sorry I don’t have any pictures during this part of the process-I got excited and made a whole bunch before I remembered I wanted to blog about this!
I then sanded both the wire spirals and the backs of the scrabble tiles to make a rough surface for the glue to adhere to.
Then I was ready to glue! After doing some reading online I’ve found that a lot of people use an adhesive called e-6000. I’ve heard mixed reviews of it, though, with some people saying that their creations fall apart using this glue! My friend Meredith of TilleyJewels suggested something called Crafter’s Goop, which I think I will try out next. My fiancé has a quick-drying two-part epoxy that he’s used for wire projects, so I tried that first because we already had it. You have to mix the two parts, then use it quickly before it begins drying.
Here is what the finished product looks like, both front and back. I’m pretty happy with how it looks, and just about ready to list them in my shop. The glue (and the results of my resin spills that I mentioned in the last post) are visible, but only on the backs of the pendants. My main concern with these was sturdiness-would the handmade bails stay on? A friend of mine has been wearing one of them and has had no problems so far. On top of that, when I was trying to take pictures of the pendants, I dropped a wooden board that I use as a background right on top of them, and the bails didn’t separate from the pendants. The adhesive wasn’t even fully cured at that point, so, I think they’re going to work pretty well!
As usual, thanks for reading, everyone! Please leave me a comment and let me know how you like the pendants. Would you buy one?


Woohoo! Glad to hear about the next stage in the pendants: giving them hanging from something thingers! The pendant example pics look great. This was an interesting post. :)
ReplyDelete