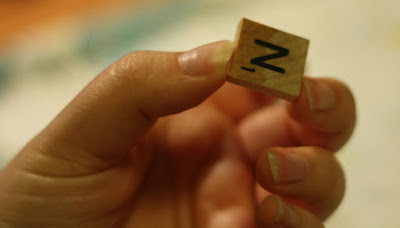
Scrabble tile pendants are pretty popular-as are variations like glass tile pendants. To put my own twist on the whole scrabble and make it a bit more 'me' I thought I'd try using my own travel photos for the designs. I also did one using some Japanese paper scraps that I bought on etsy. Scrabble tile pendants are NOT for the impatient-they take days to make if you do them this way.
Day 1: Computers, cutting, and glue (oh my!)
First I had to crop photos to the right shape, and make tiny versions of the pictures I wanted to use. I used GIMP for that-good free software! I printed them on photo paper and cut them out with an x-acto knife.
The size came out pretty close to the tiles; I might make them slightly bigger next time as I'm not sure I want the white border.
Next I glued the photos to the tiles with mod podge and waited them to dry before trimming the photos closer to the edges of the tiles.
Then I 'sealed' the paper with more mod podge-covering the surface and cut edges of the photo and let them dry overnight. Oh yeah-I should mention that our power went out mid-way through this step and I had to finish by the light of a flashlight and candles!
Day 2: Resin time!
Here is what the pendants looked like when coated in resin before I covered them up and left them to dry for 24 hours-no peeking or moving them, as you could ruin the dome! I covered them with a box top weighted down with some books to keep curious cat paws away!
They're already forming a dome, as you can see. This is only about 10 minutes after I finished putting the resin on. William the hippo plush snuck into this photo somehow . . .
24 hours later I was finally able to take a look at the pendants! I think they worked out well, despite the spills. The doming effect seems to be intact from the side view.
Now that the resin has dried, I think I'll try out some bail designs while I'm waiting for them to cure completely (this takes 3 days!) I think the hardest part of this is all the waiting. LOL I've bought some ready-made glue-on bails, but I'm determined to try making my own bails. I love hand-making as many bits as possible.
So, what do you think of my first attempt at these pendants? Has anyone else tried doing this? Please leave a comment and let me know!
Copyright 2011. See more at Voyage of the Hyperspace Hippo


LOVE LOVE LOVE!!! Gorgeous work!!! *grabby hands*
ReplyDeleteWow, so awesome! Good choice of pictures, and I love how the resin domes up over the images, cool and pretty! WANT.
ReplyDeleteWow. Congratulations! This is wonderful - sharing the joy of making with a How-To and you have done brilliantly! I envy you the Ice Resin I still have to get some * sigh *
ReplyDelete* APPLAUSE *
Thanks for the lovely comments, you guys! And whskr-I hope you get to try out some Ice Resin soon, I really liked it. It was sort of intimidating but turned out not to be so bad!
ReplyDeleteLOOKS FRACKING AWESOME. I WANT!
ReplyDeleteI couldn't resist checking out your studio and found this. Just wonderful...always wanted to try the resin...oh, when time permits :) Looks really fun and great job! Sally
ReplyDelete